How Often to Water a Bromeliad: The Cup, the Soil, and the Deciding Test
Potted bromeliads drink through their central cup, while the soil stays only slightly moist. Learn the starting frequency, how to change the cup water, what water to use, and when to empty the cup in the cold.
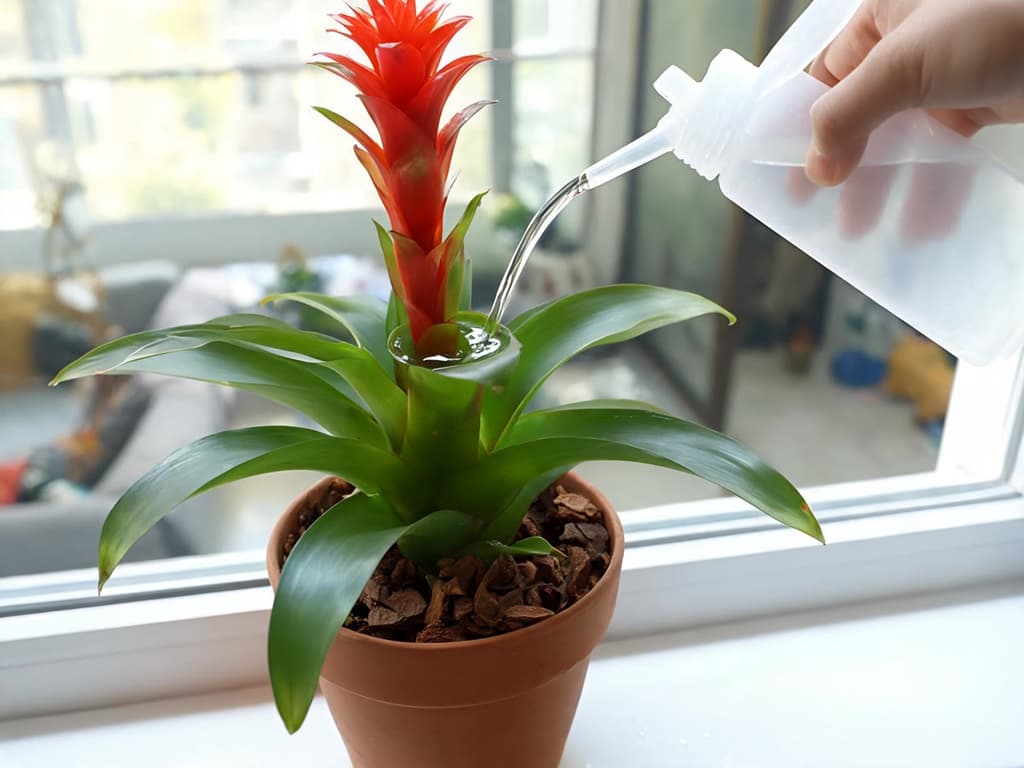
How often to water a bromeliad depends on where the water goes. For a potted bromeliad, it goes into the cup, which is the funnel of leaves at the center of the plant.
The potting soil stays only slightly moist. For an indoor plant, the University of Florida suggests watering every one to two weeks as a starting point. A ten-second test decides the date of your next watering, not the calendar.
This guide applies to tank bromeliads sold in pots: Guzmania, Aechmea, Vriesea, and Neoregelia. Tillandsia, with its thin gray leaves, follows its own rules and appears only at the end.
Quick summary:
Water in the cup or moist soil, never both soaked at the same time. The University of Maryland Extension states it is best not to keep the cup full and the roots constantly wet together.
Change the cup water once a week. This is the timeframe recommended by the Wisconsin and North Carolina extensions. Published guidelines range from "every few days" to "every two months."
In the cold, keep less water in the cup. Below 4 °C, empty the cup: cold injury shows up as a brown line right at the water level (University of Florida).
Bromeliads handle drought better than excess moisture. Two weeks without water rarely kills the plant. Waterlogged soil for weeks does.
How often to water a bromeliad
Water a potted bromeliad every one to two weeks, and use that number only to start. The University of Florida's EP337 publication recommends "once every 1 to 2 weeks" for an indoor bromeliad. In the following weeks, the test in the next section adjusts the interval for your home.
If you have already read three guides and each gave a different timeframe, you were not reading them wrong. Adding up what eight English-language sources recommend, cup water changes range from days to months:
Source | Changing the cup water | Watering the soil |
|---|---|---|
The Sill and Plant Addicts (shops) | every few days | every 1–2 weeks; 2–3 in cold weather |
Houseplant Shop (shop) | about once a week | not necessary if the cup has water |
Epic Gardening (blog) | with each watering, at most every 2 weeks | every 2 weeks; 3 in cold weather |
Joy Us Garden (blog, Arizona desert) | every 3–4 weeks | every 4 weeks; 6–8 in cold weather |
RHS (UK horticultural society) | every 1–2 months | moist, not soggy |
Wisconsin and North Carolina Extensions | once a week | only slightly moist |
Numbers from shops and blogs almost never specify their baseline climate. The author of Joy Us Garden is the exception: she waters that way because she lives in the desert, whereas she watered less in California. University extensions carry more weight, and two of them converge on a weekly water change. This guide follows the extensions.
Water in the cup or in the bromeliad's soil
Put the water in the cup and leave the soil only slightly moist. The bromeliad's cup, also called the tank, is the reservoir formed by the base of the leaves at the center of the rosette, the plant's circle of leaves. A potted bromeliad is an epiphyte: in nature, it lives attached to tree branches and stores rain in its cup. The roots serve more to anchor the plant than to drink, according to the University of Wisconsin Extension.
The rule comes from a 2022 response from the University of Maryland Extension. The specialist wrote: "it is best not to constantly have both the cup full of water and the root moist at the same time." The North Carolina Extension describes the other side. Aechmea tolerates dry air and occasionally dry roots, as long as the cup is full.
Anyone who inherited a plant with a dry cup and moist soil can fill the cup now and leave the soil as it is.
To water a potted tank bromeliad:
Pour water slowly into the center until the cup is full. A watering can with a narrow spout or a small squeeze bottle helps.
Let any overflow drain into the soil. Do not top-water the soil if it is still moist.
Check whether water drains from the bottom hole. If nothing comes out within a few seconds, the soil is compacted and the roots will rot.
Empty the saucer beneath the pot as soon as it stops dripping.
The University of Florida suggests a second method. Take the plant to the sink or shower and let lukewarm water fill the cup and rinse over the leaves and soil. Then, empty the cup. Both methods follow the same rule, because neither leaves a full cup and waterlogged soil together for days.
The test that decides your next watering
Look at the cup and feel the soil before watering. These are two questions with two independent answers:
Does the cup still have water? If it does and a week has passed, flush the water. If it dried up before a week, fill it again.
Is the soil moist 2 cm (about 1 inch) down? If it is, do not water the soil. If it is dry, water the soil slowly until water drains from the hole.
The interval changes with the pot and with where the plant is located. Clay pots dry faster than plastic pots, notes the University of Wisconsin. A bromeliad mounted on a log or wooden plaque needs more frequent watering than one in a pot. A pot that is too large for the roots stays wet longer and rots the roots.
Soil that never dries out also attracts the gnat that lives in moist potting soil. When this gnat appears around the bromeliad, the soil has been wet for too long.
Aechmea, with silver leaves and pink flowers, is the bromeliad described by the North Carolina Extension as tolerating dry roots when its cup is full:
Flush the cup water every week
Flush your bromeliad's cup water once a week. Tip the plant over the sink, let all the old water drain out, and fill it again with fresh water. The North Carolina Extension recommends flushing the cup weekly to keep the water from stagnating.
The primary reason is mineral buildup. Water evaporates from the cup, leaving behind the salts it carried. The University of Wisconsin explains that with water containing moderate mineral levels, you must flush the cup weekly. A weekly flush prevents the mineral buildup that causes leaf tips to die back.
If the cup contains dead foliage or algae, flush it twice before refilling. Clemson describes the exact same routine: filling, turning the plant upside down, and refilling to prevent stagnant water and salt buildup.
What water to use in the bromeliad cup
Tap water works for most bromeliads, according to the University of Wisconsin. Two exceptions require attention. Softened water from a water softener contains sodium and should not go on the plant. Alkaline water should also be avoided, as the family's preferred range runs from pH 4.0 to 7.0.
Hard water with high mineral content does not make the bromeliad sick. Hard water leaves white spots on the foliage, which stand out more on smooth green leaves. If the spotting bothers you, use rainwater, which is the option favored by university extensions.
The tip to let tap water sit overnight to remove chlorine appears in two of the guides in the table. The CDC, the disease control center of the United States, says chlorine leaves this way in a few days. Chloramine, the other disinfectant used in city water, does not leave this way. A night in the pitcher resolves neither.
Some sources claim that fluoride in tap water harms bromeliads. I found no university extension that has measured this effect on bromeliads. What the extensions do document is salt buildup in the cup, and a weekly water flush resolves it.
Distilled or reverse osmosis water requires a specific precaution. The University of Wisconsin warns that extremely pure water can pull nutrients out of the leaves. Add a tiny amount of fertilizer to this water. Miniature bromeliads are the most sensitive to salts, and the same source instructs using distilled water for them at all times.
In the cold and low light, keep the cup nearly empty
In cold conditions or low light, the bromeliad grows slowly and uses less water. Leave only an inch of water at the bottom of the cup and space out watering the soil. This care applies to the cold months of the year and to homes in mountainous regions.
Below 4 °C, empty the cup. The University of Florida directs you to remove the water from the cup whenever temperatures can drop below 40 °F (about 4 °C). Cold damage appears as a brown line running across each leaf, right at the level where the water was. That kind of cold is rare indoors, but it can happen on an open porch on the coldest nights of the year.
A full cup in a cold, dark room also invites heart rot. That is the name for rot starting at the center of the plant, where new leaves emerge. The University of Maryland Extension notes that indoor bromeliads are more prone to this rot because air circulation is poor.
Bromeliads in bloom, after flowering, and with pups
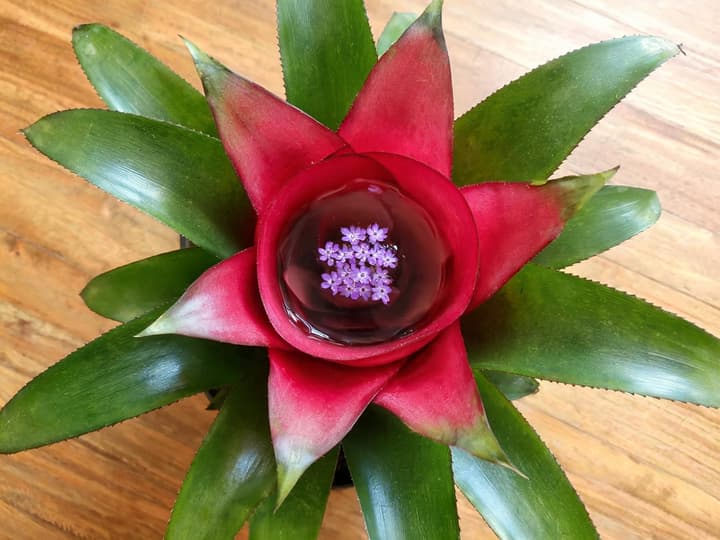
Keep filling the cup while your bromeliad is in bloom. In Neoregelia, flowers emerge inside the cup. The University of Wisconsin notes that the tiny blossoms barely rise above the water line at the center of the plant, which is completely normal for the genus.
After the flower dries up, the mother plant begins to decline slowly. None of the extension services consulted advise cutting off water to the mother during this phase. The RHS states the opposite: a plant bought already in bloom rarely comes with pups, and they usually appear if you keep watering. Maintain the same routine from the test.
What does change is the pup, the new offset that emerges at the base of the mother plant. While attached to the mother, it shares the soil of the same pot. When the pup grows large enough to form its own cup, add a little water to its cup as well.
Signs of overwatering and underwatering in bromeliads
Your bromeliad signals problems through leaf color and center firmness.
Soft, dark center
A soft, dark, or foul-smelling center points to rot, which is the most severe symptom. The North Carolina Extension advises emptying the cup and trimming away dead tissue. Then, let the plant dry out before returning to your regular routine.
Pale leaves
Pale leaves can almost never be resolved solely by altering watering. The University of Florida reports that yellowed or pale green leaves can indicate light that is too intense. The University of Wisconsin notes that excess fertilizer causes the plant to lose its color. Furthermore, a mother plant that has already bloomed naturally fades and yellows on its own as it declines.
If you watered the soil every week and left the cup dry, the water went to the wrong place. Pale leaves, however, usually come from light, fertilizer, or the age of the plant. To separate the causes using a photo of the symptom, see the guide on how to find out what is wrong with your plant.
Dry, brown leaf tips
Dry tips stem from two causes documented by the University of Wisconsin. One is concentrated minerals in stagnant cup water. The other is very dry air with wind or air conditioning blowing onto the plant. Flush the cup water weekly for two weeks: if new tips still turn dry, dry air is the cause.
Bromeliad wilted after days without water
A bromeliad that has wilted after two weeks without water almost always bounces back. The University of Florida describes the plant as "extremely tolerant" of dry conditions, capable of surviving extended drought periods.
To revive an underwatered plant:
Press the center of the plant with your finger. If it feels firm, the cause is underwatering. If it feels soft or dark, rot is present, and the previous section covers what to do.
Fill the cup with room-temperature water.
Water the soil once until it drains out the bottom hole, and empty the saucer.
Return to your weekly test. Do not overwater to compensate for dry days.
If the leaves remain wilted while the center stays firm and the cup has water, another problem may be at play. A photo clarifies doubts faster than guessing: Bloom (iOS) identifies the bromeliad genus and species from a picture. Knowing whether you have a Guzmania or an Aechmea changes how much light and water it can handle.
Tillandsia has different watering rules
Tillandsias do not have a cup and, often, do not have soil either. You water them by soaking. Clemson recommends submerging the entire plant in room-temperature water for about half an hour, every 7 to 10 days. The University of Wisconsin warns that misting alone is not enough for them.
The logic of the tank bromeliad does not apply to the orchid either, another common potted epiphyte. In orchids, standing water in the crown rots the plant, and the guide on how to care for orchids explains watering through the roots.
Frequently asked questions
How do I know if my bromeliad needs water?
Check the cup and touch the soil. A dry cup calls for water in the cup. Soil dry 2 cm (about 1 inch) deep calls for watering the soil until it drains from the bottom. If the cup contains water and the soil is moist, wait. Wilted leaves with a firm center also signal thirst.
How long can a bromeliad go without water?
Tank bromeliads tolerate two weeks without water with little damage, and the University of Florida describes them as very drought-tolerant. The larger threat is the opposite: waterlogged soil for weeks rots the roots. Before traveling, fill the cup and water the soil only if it feels dry.
Do bromeliads like being misted?
Misting helps when household air is dry, and the North Carolina Extension suggests misting bromeliads in that situation. Misting does not replace cup water or weekly water flushes. For Tillandsia, the University of Wisconsin warns that misting is not enough: proper watering requires soaking.
Do bromeliads need a lot of water?
No, they need small amounts of water in the right place: water in the cup and only slightly moist soil. The University of Florida attributes most bromeliad problems to root rot caused by excess moisture. For indoor bromeliads, it recommends watering every one to two weeks.
In one sentence
Fill the cup, keep the soil nearly dry, and flush the cup water once a week. In the cold, keep only a little water in the cup. Today, tip your bromeliad over the sink, let the old water pour out, and fill the cup again.
Related articles
How to Care for a Maidenhair Fern: Light, Water, and Revival Tips
Learn how to care for a maidenhair fern indoors: bright indirect light, consistently moist soil, high humidity, and how to revive it if it dries out completely.
How to Propagate Spider Plants: Root the Pup Before Cutting
The safest spider plant cutting comes from a pup still attached to the mother plant: rest the plantlet on soil in a small pot, wait for roots to establish, and only then cut the stolon. Learn when the pup is ready, whether rooting in water is worth it, how to divide the clump, and why plants fail to produce babies.
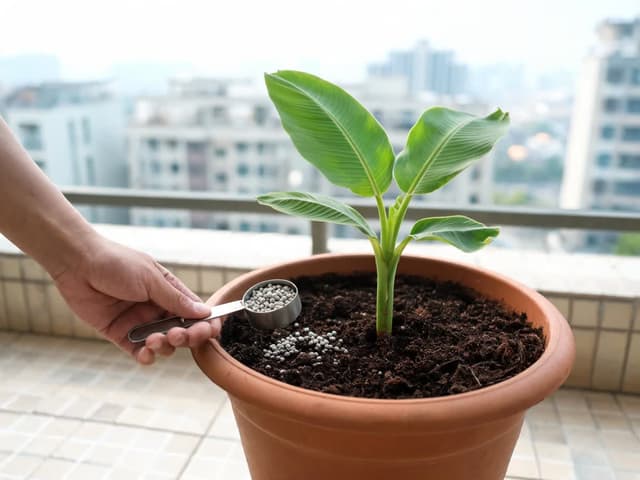
Banana plant fertilizer: fertilizing potted and backyard plants
Banana plant fertilizer needs more potassium than nitrogen, in a 3-1-6 ratio. For a potted plant on a balcony, use the label dose in spring and summer. In the backyard, fertilize every 2 months, adjusting the amount by mat age. Learn the formula, timing in Brazil, and signs of deficiency or excess.