How to Propagate Bromeliads: When to Separate Pups and Where to Plant
A bromeliad pup is the offshoot that grows at the base of the plant after it blooms. Learn what size to separate it, where to cut, whether to let the cut dry, where to plant, and how long rooting takes.
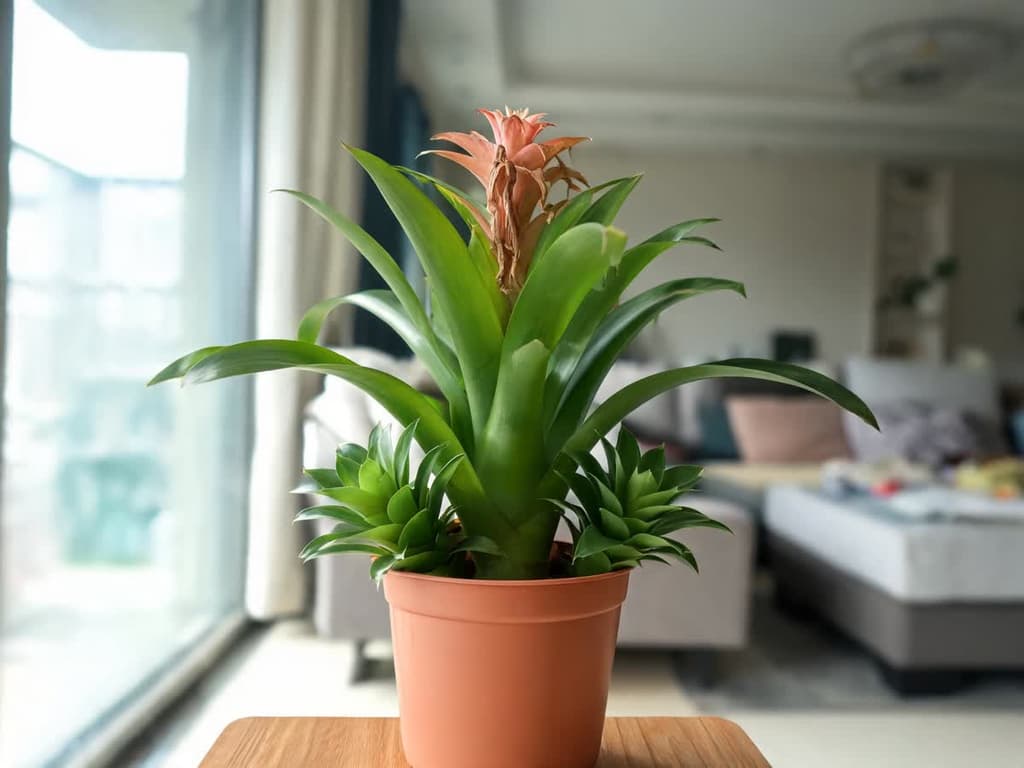
To propagate a bromeliad, you separate the pup, the small plant that grows at the base of the bromeliad after it blooms. Wait until the pup is one-third to half the size of the mother plant and cut it flush to the mother using a clean knife. Let the cut dry for a day and plant it in a small pot. Until new roots appear, keep the pup in bright indirect light and keep the potting mix on the drier side.
If your bromeliad bloomed and is now drying up with a pup alongside it, there is no hurry at all. The mother plant takes one to two years to die after blooming, according to the University of Florida and the Bromeliad Society International (BSI). During that time, it continues producing pups. This guide applies to tank bromeliads, which have a central funnel formed by the leaves that holds water. It covers guzmania, urn plant (Aechmea), vriesea, and neoregelia.
Quick summary:
Size to separate: one-third to half the height of the mother. Sources range from 1/3 (Wisconsin, North Carolina, RHS) to 1/2 (Florida). The deciding factor is whether the pup already has its own roots.
Where to cut: as close as possible to the mother, without injuring the mother. A pup attached by a hard stem (stolon) requires a serrated knife.
After the cut: one day drying in the shade, then a small pot, bright indirect light, and little water in the potting mix.
Time: at a commercial grower, the first root appeared in about 30 days in summer and 45 days in winter. A fully rooted plant took 3 to 5 months.
Flowering: the pup blooms 1 to 3 years later, depending on the genus.
What a bromeliad pup is
A bromeliad start is the pup, also called an offset or side shoot. It is a new rosette that the plant forms at the base, attached directly to the mother plant or connected to it by a stem. Most potted bromeliads bloom only once. After flowering, the rosette that bloomed slowly declines and leaves the pups in its place.
Propagating a bromeliad means dividing the plant: you separate an existing plant that already has its own base and almost always has roots. It follows the same principle as dividing a clump of peace lily. With a wax plant, it is different: a cut stem piece must grow roots from scratch.
In two bromeliads, the pup can form away from the base. In tillandsia and cryptanthus, the pup can grow higher up on the mother plant. It grows so loose that it comes off by hand, notes the BSI culture brochure.
Guzmania is the most widely sold red-flowered bromeliad in pots, and the pup usually appears while the bract (the colorful leaf that looks like a flower) still shows color:
When to separate a bromeliad pup
Separate the pup when it reaches one-third to half the size of the mother plant and already shows its own roots at the base. Sources agree on the method and differ on the minimum size:
Source | Pup size to separate |
|---|---|
University of Wisconsin Extension | about 1/3 of the mother |
North Carolina Extension (Aechmea guide) | about 1/3 of the mother |
RHS (Royal Horticultural Society, United Kingdom) | about 1/3 of the mother |
North Carolina Extension (Beaufort, 2025) | 1/3 to 1/2 of the mother |
BSI (Bromeliad Society International) | 1/3 to 1/2 of the mother |
University of Florida (EDIS EP337) | half of the mother |
With sources differing between one-third and half, roots are the deciding factor: pull back the lower leaves of the pup and check the base. If short roots are already emerging from the pup, you can separate it from the mother. If the base is smooth, wait a few more weeks. While still attached, the pup continues receiving nutrients from the mother plant.
A bromeliad purchased in bloom rarely comes with a pup. The RHS explains that new shoots usually appear if you continue watering the plant normally after flowering. An older plant can stay in the pot for two to three years, sending up pups periodically.
How to propagate a bromeliad, step by step
You need a sharp clean knife (or pruning shears), rubbing alcohol to clean the blade, and a small pot with drainage holes. Once the pup reaches the right size:
Gently clear away the mix around the base to see where the pup attaches and where its roots are. If you cannot see clearly, take the plant out of the pot for a few minutes, holding it by the base.
Clean the blade with rubbing alcohol. A dirty blade introduces fungi into the cut.
Cut the pup as close as possible to the mother plant, without injuring the mother, as directed by the BSI. Keep all of the pup's roots intact.
Remove any dry or brown leaves from the base of the pup.
Let the pup dry for a day, lying flat in the shade, so the cut calluses over.
Plant in a small pot, burying only the base of the pup. Keep the lower leaves above the potting mix.
If you removed the mother plant from the pot, return it right after cutting. Any remaining attached pups will continue feeding from it.
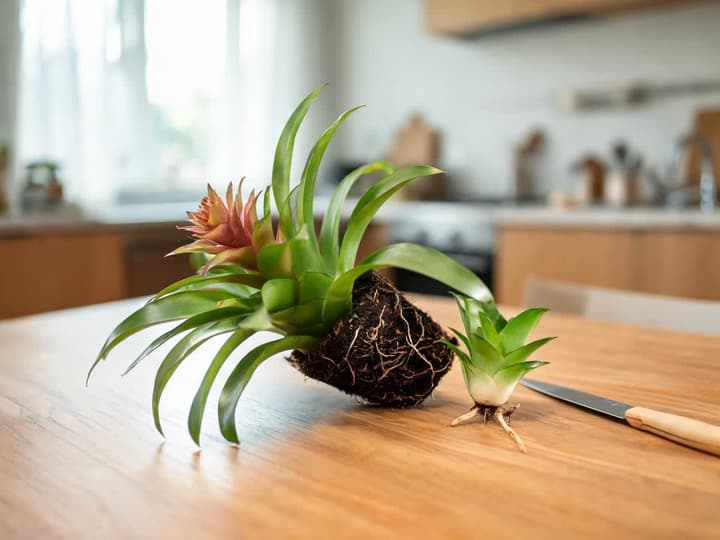
Pups on a hard stem vs. flush against the mother
Bromeliad pups emerge in two ways, and the cutting technique changes accordingly. Some pups grow flush against the base of the mother, nestled between the bottom leaves. Others grow at the tip of a stolon, a runner emerging from the mother that is often woody and stiff.
Flush pups: cut flush to the mother plant. Professor Cláudio Coelho de Paula, from the CPT bromeliad course, uses a chisel when the pup grows between the leaves.
Stolon pups: the same professor cuts the stolon about 5 cm before the pup. The BSI recommends a serrated knife or small saw for woody stolons. If the stolon is long, trim it before potting.
Let the cut dry or plant immediately?
Let the cut dry for a day before planting. That is the recommendation from the North Carolina Extension, and the CPT professor goes a bit further: plant 1 to 2 days later. He suggests applying crushed charcoal to the cut and keeping water in the pup's cup while the cut dries.
The University of Florida makes no mention of drying: it directs you to cut the pup and plant it. The BSI also does not mention drying and suggests applying a rooting fungicide to the cut. Nobody has compared both methods side by side in bromeliads.
This guide follows the one-day drying period. The CPT professor recommends drying the cut precisely to prevent fungal rot, and none of the sources state that drying harms the pup.
Where to plant bromeliad pups: pot, ground, or tree trunk
A bromeliad pup can go into a pot, into garden soil, or mounted on a tree trunk. The choice depends on your space, and each option has rules.
In a pot. Use a small pot sized to the pup, not a large pot to "grow into." Excess potting mix around small roots stays wet for days and rots the base. The potting mix must be airy and fast-draining; pure garden soil retains far too much water.
In the ground. Tank bromeliads live in the ground in warm climates, in beds with bright indirect light. The University of Florida states that sandy, well-drained soil works well. In heavy clay soil, mix in a 5 to 7.5 cm (2 to 3-inch) layer of organic matter, such as compost, before planting. Pick a spot with bright shade where rainwater does not pool.
On a tree trunk. Many bromeliads grow mounted on trees in the wild, and the pup can go onto a trunk. The University of Florida recommends securing it with glue and pantyhose until the roots grip the bark. The BSI adds coated wire, staples, or nylon stocking strips, and warns: never use bare wire or strangle the base of the pup. Urn plants and tillandsias do well mounted on trunks.
The first months of the pup: shade, low water, and patience
During the first few weeks, the bromeliad pup needs bright shade, humid air, and nearly dry potting mix. The University of Wisconsin Extension recommends keeping the pup in a shadier, more humid spot until new roots grow. The same source recommends keeping the potting mix on the drier side during this period to prevent the base from rotting.
Light: bright indirect light, with no direct sun on the foliage.
Humidity: the RHS suggests covering the pot with a clear plastic bag in a warm, bright spot.
Water: keep a little water in the pup's tank and water the potting mix only when it dries out. North Carolina also advises light watering until the offset establishes.
Stability: the pup has rooted once you give the base a gentle tug and it does not shift in the pot.
Rooting time depends on temperature. A commercial grower of neoregelia documented timelines in a Florida greenhouse. The first root appeared in about 30 days in summer and 45 days in winter, with greenhouse temperatures between 30 and 32 °C. The rooted starter was ready in 3 to 4 months in summer and 3 to 5 months in winter, at 18 to 22 °C.
The numbers are from a single cultivar, in a greenhouse, and are in the patent for Neoregelia 'Mendoza'. Indoors and in the cold, count on the longer timeframe.
The best time to separate is spring. The RHS recommends April or May, which is spring in the Northern Hemisphere; in Brazil, this corresponds to October and November. Separating in winter, from June to August, works, but roots take longer. In the South of the country, where nights get colder, wait for spring instead.
Once rooted, the pup blooms 1 to 3 years later, depending on the genus and location, according to the BSI. The University of Florida estimates about a year from pup to mature plant, and notes that some species take much longer.
What to do with a pup that broke off rootless
A rootless pup can still become a viable plant. The BSI outlines a specific method for it. Use a plastic pot tall enough to keep the pup upright. Add only a small amount of peat moss at the bottom, rest the pup on top of it, and do not add any other mix to the pot. Water it like your other bromeliads; according to the BSI, roots typically develop without difficulty.
If your next pup is still on the mother with a completely smooth base, give it a few more weeks before cutting.
The alternative: leaving pups on the mother plant
You do not have to separate bromeliad pups. The RHS outlines two ways to let nature take its course:
A single pup: after flowering, remove the old rosette and repot the pup in a smaller pot, sized to the pup.
Multiple pups: let one grow in place and separate the others when they reach about one-third the size of the mother.
Pups left together form a clump, a cluster of rosettes sharing the same pot or garden bed. In landscape bromeliads, clumping eliminates the need to cut: each rosette that blooms leaves pups behind in its place.
Even with the pups attached, each individual tank needs water. The tank is the cup formed by the foliage at the center of the rosette.
Does a bromeliad die after producing pups?
The rosette that bloomed will die, but slowly, and not because of the pup. Its death is triggered by flowering: most bromeliads bloom only once. The University of Florida and the BSI estimate one to two years between flowering and the death of the rosette. During this period, the mother plant keeps producing pups until the very end, according to the BSI.
As long as pups remain attached, keep the mother plant in the pot: it supplies nutrients to the pup. Cut the spent flower stalk flush at the base with clean shears. Once the mother has turned completely brown and dry, or once you have removed the last pup, discard what remains of it. The RHS instructs removing the old rosette's debris before repotting the pup.
Why bromeliad pups rot or fail to take
Nearly every lost pup dies from excess moisture at the base or from being removed from the mother too early.
What you see | Probable cause | What to do |
|---|---|---|
Pup base soft and dark, leaves coming loose | Waterlogged potting mix or oversized pot | Remove from pot, trim rotted tissue, let dry for a day, and replant in a smaller pot with dry mix |
Pup firm, but neither growing nor rooting after 2 months | Cold temperatures or pup separated without roots | Move to a warmer, brighter spot; if rootless, use the BSI tall pot method with peat moss |
Foliage bleached or showing pale scorched patches | Direct sunlight hitting the pup | Provide bright indirect light until rooted |
Pup wilted and wrinkled | Separated too small, lacking roots, and dry tank | Add water to the tank and raise humidity (plastic bag); next time, wait for 1/3 mother size |
If you are not sure which bromeliad you have at home, a photo solves it. Bloom (iOS) identifies the species from a picture and displays its specific care guide. Knowing the genus helps you dial in the pup's lighting, since an urn plant handles brighter light than a guzmania.
Frequently asked questions
Can you root a bromeliad pup in water?
None of the consulted extension sources recommend rooting bromeliad pups in water. The University of Wisconsin directs the exact opposite: keep the potting mix on the drier side until new roots emerge, because moisture rots the base of the pup. Pot the pup in a small container and keep water only in its tank.
At what size should you remove a bromeliad pup?
At one-third to half the size of the mother plant. One-third is the minimum stated by Wisconsin, North Carolina, and the RHS; half is what the University of Florida recommends. Before cutting, peel back the lower leaves: if the pup already has short roots at the base, it is ready.
How long does a bromeliad pup take to bloom?
From 1 to 3 years after separation, depending on the genus and growing conditions, according to the BSI. The University of Florida estimates about one year from pup to mature plant, noting that some species take considerably longer.
Can you grow bromeliads from seed?
Yes, but it is rarely worth the effort at home. The RHS warns that seed-grown plants can take five years or more to bloom. Bromeliad flowers also rarely pollinate themselves indoors, requiring manual pollen transfer with a small brush.
Related articles
How to Care for a Maidenhair Fern: Light, Water, and Revival Tips
Learn how to care for a maidenhair fern indoors: bright indirect light, consistently moist soil, high humidity, and how to revive it if it dries out completely.
How to Propagate Spider Plants: Root the Pup Before Cutting
The safest spider plant cutting comes from a pup still attached to the mother plant: rest the plantlet on soil in a small pot, wait for roots to establish, and only then cut the stolon. Learn when the pup is ready, whether rooting in water is worth it, how to divide the clump, and why plants fail to produce babies.
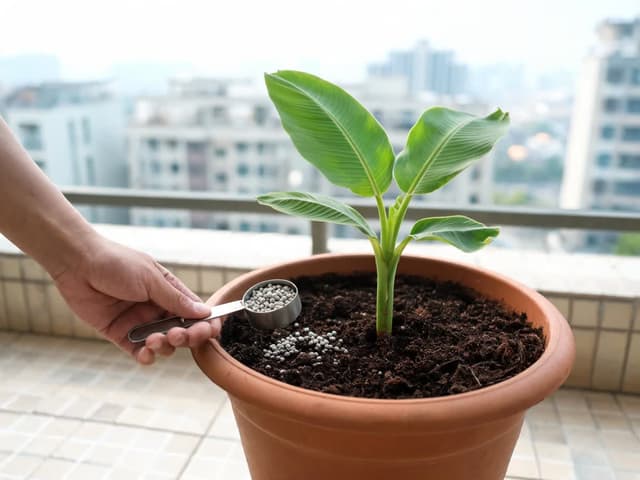
Banana plant fertilizer: fertilizing potted and backyard plants
Banana plant fertilizer needs more potassium than nitrogen, in a 3-1-6 ratio. For a potted plant on a balcony, use the label dose in spring and summer. In the backyard, fertilize every 2 months, adjusting the amount by mat age. Learn the formula, timing in Brazil, and signs of deficiency or excess.