Soil for Camellias: Acid Soil in Pots and in the Garden
Soil for camellias must be acidic, loose, and well-draining, with a pH close to 5.5. Learn how to check the pH label, make a potting mix, improve drainage, and handle chalky garden soil.
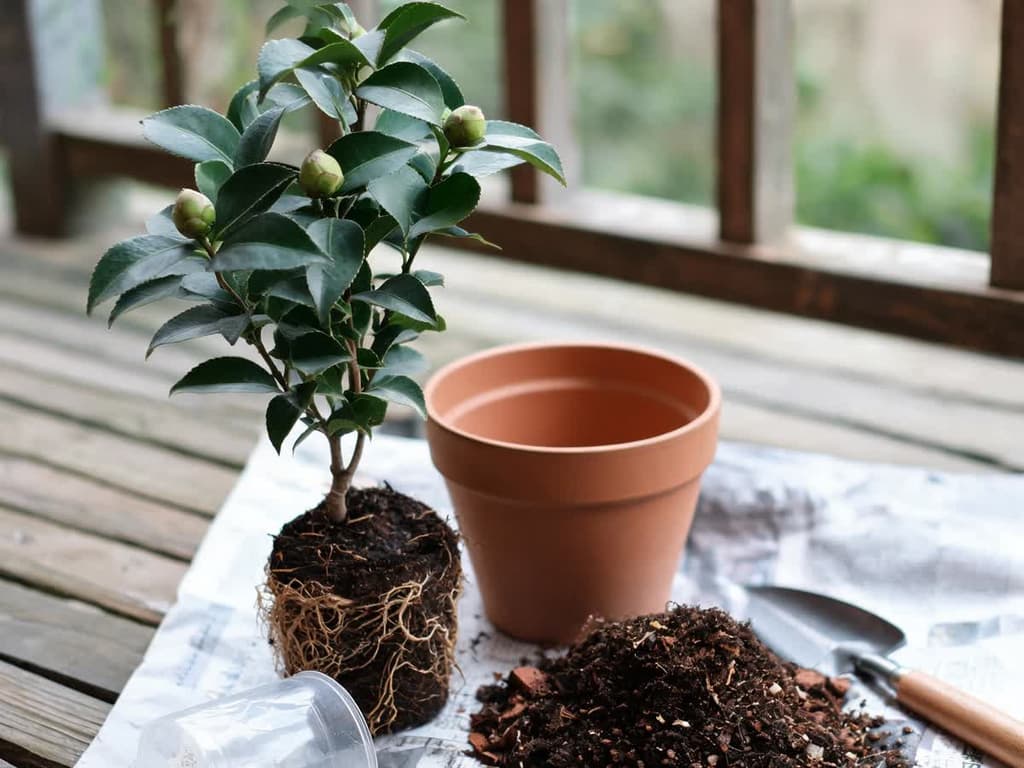
The best soil for camellias is acidic, loose, and drains water freely without becoming waterlogged. Substrate is the ready-to-use potting mix in a container. In pots, use a mix for acid-loving plants. The bag label should state a pH of 6.0 or lower (pH measures soil acidity). In the garden, test the soil pH before planting.
This guide covers Japanese camellia (Camellia japonica), the same species featured in the camellia plant profile. Sasanqua camellia (Camellia sasanqua) tolerates neutral to acidic soil, according to NC State. Light, watering, fertilizing, and pruning are covered in the complete camellia care guide.
Quick summary:
pH: aim for 5.5 to 6.0. This range fits within the recommendations of both universities cited here.
Pots: potting mix for acid-loving plants, blended with fine pine bark and coarse sand. Never use regular garden soil.
Peat (decomposed plant material harvested from bogs): use coarse peat only. Fine peat moss gets soggy or dries out too severely, according to the American Camellia Society.
Drainage: an open drainage hole and a pot appropriately larger than the root ball (the mass of roots and soil), without overpotting.
Chalky garden soil (soil containing limestone, a mineral that raises pH): if your soil fizzes in vinegar, sulfur will not lower its pH. Grow the camellia in a pot instead.
Repotting: refresh the soil every 2 to 3 years, without burying the top of the root ball under new soil.
Camellia dropping buds in universal potting mix: should you change the soil now?
Do not repot a camellia covered in buds simply because buds are dropping. Bud drop is caused by underwatering, overwatering, late fertilizer applications, cold drafts, or extreme heat. The table in the camellia care guide explains each trigger. Soil with an elevated pH shows a completely different symptom: yellow leaves with green veins.
None of the sources cited in this guide evaluated the effects of repotting a camellia loaded with buds. The safest choice is to wait until flowering ends. Until then, take three steps:
check the pH listed on your bag of universal potting mix; if it is above 6.0, add repotting to your to-do list for after blooming finishes;
water only when the top layer of soil feels dry to the touch, until water drains through the hole;
use rainwater if your tap water is hard (containing high levels of lime).
If you already replaced the soil and the plant declined, do not repot it again. Check if the fresh soil is soggy: the American Camellia Society recommends keeping the soil consistently moist, never waterlogged. If it is saturated, empty the saucer beneath the pot and let the surface dry to the touch before watering again.
What is the ideal soil pH for camellias?
The ideal soil pH for camellias ranges from 5.5 to 6.0. The pH scale measures soil acidity from 0 to 14. Below 7, soil is acidic; at 7, it is neutral; and above 7, it is alkaline. Each point drop on the scale represents a tenfold increase in acidity. Because of this, soil at pH 5.5 is 10 times more acidic than soil at pH 6.5.
The sources do not list an identical single number. The table compares the ranges recommended by each institution:
Source | pH range | Scope / Camellia type |
|---|---|---|
5.5 to 6.5 (and "acidic, below 6.0" in the plant profile) | Japanese camellia | |
5.5 to 6.5 ideal; up to 7 acceptable | Camellias in general, in containers and gardens | |
5.0 to 6.5 | Camellias in general | |
5.8 to 6.5 | Camellias in general | |
4.5 to 5.5 | Japanese camellia, citing a 2000 literature review |
The range of 5.5 to 6.0 fits fully inside the recommendations of the first three sources in the table. It borders the other two: the International Camellia Society starts at 5.8, while the Pontevedra study ends at 5.5. This guide recommends 5.5 to 6.0. That target fits entirely within the guidelines from both universities (NC State and UF/IFAS) and the American Camellia Society. No research has identified a single exact optimum pH value.
Insufficiently acidic soil cuts off a camellia's access to iron and manganese. The literature review cited by the Pontevedra study links soil pH above 5.5 to deficiencies in these two micronutrients. The other four sources in the table accept values above 5.5. The leaves turn yellow while the veins stay green, a classic pattern of chlorosis explained in camellia yellow leaves. In that same study, two out of four Japanese camellia cultivars showed reduced growth when the soil received lime.
How to test soil pH before planting
You can check soil pH in two ways: reading the product label on the bag or using a soil test kit. The label applies to commercial potting mixes, while a test kit evaluates garden soil. The vinegar test does not measure pH: it simply detects free lime in the garden bed.
Checking pH on the potting mix label
In Brazil, every bag sold as "plant substrate" must state the pH on the label. The rule is Normative Instruction No. 5 of 2016 from the Ministry of Agriculture. It also requires listing the electrical conductivity (EC), which indicates the amount of salts, and water retention.
The same standard allows a variance of up to 1 pH unit above or below the stated value. A bag labeled with a pH of 6.5 can legally measure as high as 7.5. For camellias, pick a bag listing a pH of 6.0 or lower. Because the actual batch can test up to 1 unit higher than stated, aim for labels closest to 5.5 whenever available.
Soil pH test kits and the vinegar fizz test in the garden
For garden soil, use a pH kit from a garden center. The RHS, the horticultural society of the United Kingdom, says these kits are easy to use. Collect soil from the top 6 inches (15 cm), the layer the RHS uses to calculate sulfur doses.
The vinegar test answers a different question: whether your soil contains free limestone. Place a spoonful of garden soil in a glass and cover it with vinegar. If the soil fizzes, it contains calcium carbonate, according to the RHS. When soil fizzes, the RHS notes that attempting to acidify it with sulfur is not practical.
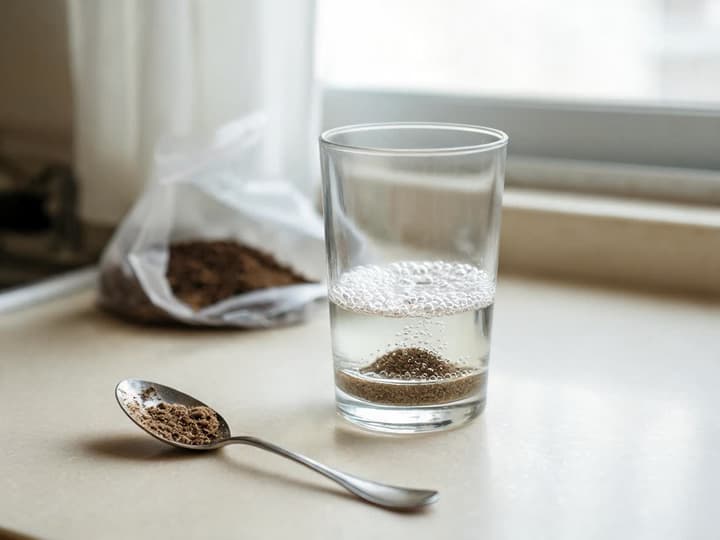
Where tap water is hard (containing high amounts of dissolved lime), the RHS recommends watering camellias with collected rainwater.
Potting mix for container camellias
The potting mix for container-grown camellias is a mix for acid-loving plants, sometimes sold as azalea potting mix. The American Camellia Society states that the most practical way is to buy a ready-made mix for camellias and azaleas. The RHS recommends the same type of potting mix, in a peat-free version. The azalea requires the same acidic soil, and both can share the bag.
Check two numbers on the label: a pH of 6.0 or lower and the lowest electrical conductivity (EC) among the bags you compare. Camellias are especially sensitive to salts in container soil, according to the Connecticut Agricultural Experiment Station. Excess salt burns the roots.
DIY soil mix recipe for camellias
The American Camellia Society shares a potting blend created by one of its growers. It uses equal parts by volume:
1 part fine pine bark;
1 part washed coarse sand;
1 part leaf mold or coarse peat moss;
1 part commercial camellia and azalea potting mix.
Pine bark keeps the potting mix loose and well-aerated over time because it breaks down slowly. As it decomposes, it consumes a small amount of the available nitrogen in the soil. Because of this, the society advises feeding the plant once or twice a year with a fertilizer formulated for camellias and azaleas.
The American source refers to pine bark. The pine bark sold in Brazil comes from the same group of trees. The difference lies in the piece size. The American Camellia Society uses fine bark in the potting mix and reserves coarse bark for the bottom.
Peat moss versus peat-free potting mixes for camellias
Peat moss (partially decomposed organic matter harvested from peat bogs) keeps potting soil acidic. The American Camellia Society approves coarse peat moss while advising against fine peat moss. Finely ground peat either becomes waterlogged or dries out into a water-repellent brick, both of which can kill a camellia.
The RHS recommends peat-free potting compost for container-grown camellias. For acidifying garden beds, the RHS has also moved away from using peat moss. A German gardening publication recommends a mix made of 6 parts white peat to 1 part of each other ingredient. This guide follows the American Camellia Society recipe because it originates from an organization dedicated specifically to camellias. To grow peat-free, substitute leaf mold and select a packaged potting soil labeled "peat-free."
Garden soil in containers
Do not use topsoil or regular garden dirt in pots. The American Camellia Society explains that native soil compacts quickly and rapidly loses its organic structure. The RHS adds that all container mixes naturally degrade over time and begin holding excess water.
Container drainage: holes, pot size, and bottom layers
A camellia pot requires drainage holes and must be appropriately sized for the root ball, without excessive empty space. The American Camellia Society emphasizes that camellias cannot tolerate soggy roots. The RHS warns that oversized containers lead to root rot: soil without active roots stays wet for too long.
The layer of stones at the bottom of the pot divides sources. Washington State University (WSU) explains that water only moves from fine soil into the stones once the soil is already saturated. According to WSU, the layer gets in the way. An experiment published in PLOS ONE in 2025 measured the opposite. Nearly every layer reduced the water retained in the pot, meaning it left the soil less wet.
The author of that study explicitly noted that the trials tested unplanted containers. The American Camellia Society permits gravel or pot shards at the base. Their highlighted grower prefers a 2 to 3 inch (5 to 8 cm) layer of coarse pine bark at the bottom. None of the referenced sources tested bottom layers in pots planted with living camellias. For this reason, this guide neither mandates nor forbids bottom drainage layers. The most reliable setup does not depend on them: ensure unobstructed drainage holes and use a loose potting mix.
Waterlogged roots encourage root rot caused by Phytophthora, a soilborne organism that infects camellias:
Empty excess water from collection saucers after every watering so the bottom of the container does not sit in standing water.
Camellias in the garden: clay or chalky soils
In garden beds, your planting hole amendments depend on the soil texture: sandy, medium loam, or heavy clay. The American Camellia Society offers a simple hand test: moisten a handful of garden soil and squeeze it firmly.
Sandy soil (crumbles without holding shape): dig a planting hole twice as wide as the root ball. Blend the excavated soil with equal parts leaf mold or coarse peat and fine pine bark.
Medium loam (forms a ribbon 1 to 2 inches / 2.5 to 5 cm long): already suitable. To improve it, mix equal parts coarse sand and organic compost into the excavated soil.
Clay soil (forms a sturdy ribbon 2 inches / 5 cm or longer): discard as much native clay as possible from the hole. Backfill using equal parts coarse sand, medium pine bark, and organic compost.
Plant shallow. UF/IFAS recommends digging the hole 2 to 3 times wider than the root ball and slightly shallower. The top of the root ball sits 1 to 2 inches (2.5 to 5 cm) above the surrounding soil level, because the soil settles later. Camellias do not tolerate deep planting.
How to lower garden soil pH
Elemental sulfur powder is the standard amendment used to acidify garden soil, according to the RHS. Soil bacteria convert sulfur into sulfuric acid. The biological reaction takes weeks to start and months in cold soil, so apply it outside of winter.
The RHS provides application rates for the top 6 inches (15 cm) of soil. To drop soil pH from 7.0 or 7.5 down to 6.0 to 6.5, apply 4 to 8 oz of elemental sulfur per square yard (135 to 270 g per square meter). This target range of 6.0 to 6.5 remains fully aligned with guidance from NC State, UF/IFAS, and the American Camellia Society. The RHS does not list rates for lowering pH further. Use the lower rate on sandy soils and the higher rate on heavy clays. Soils rich in organic matter require higher doses.
Apply several small split applications over multiple months rather than one heavy application. Re-test the pH annually and only reapply if necessary. Overly acidic soil also stunts plant growth, warns the RHS.
Aluminum sulfate acts as soon as it dissolves in the soil, but the RHS and Clemson warn that repeated doses accumulate aluminum in the soil. The RHS states that you need 7 times more aluminum sulfate than sulfur. Pine needles and pine foliage used as mulch only slightly acidify the soil, according to Clemson.
Chalky soil: when to move your camellia to a container
If the soil fizzes in vinegar, give up on acidifying the garden bed. The RHS says that free lime would require huge amounts of sulfur for many years. Lowering the pH only works in slightly alkaline soil.
In this situation, grow your camellia in a container filled with an acid-loving potting mix. The RHS and UF/IFAS both recommend container growing whenever native soil lacks adequate acidity. Do not apply sulfur inside potting containers: the RHS notes it is not suitable for potting mixes.
Never add lime to a camellia's planting hole. Agricultural lime is a soil amendment designed to neutralize acidity and raise pH. In the Pontevedra study, liming reduced the growth of two out of four Japanese camellia varieties tested.
When to repot a camellia
Repot container-grown camellias every 2 to 3 years. The American Camellia Society explains that after 3 years, container mix breaks down, becoming dense, sour, and waterlogged. If the camellia is still growing, step up to a slightly larger container. The society illustrates this by upsizing a 1-gallon (4-liter) pot to a 3-gallon (11-liter) pot after 2 years. Do not jump to an excessively large container: the RHS cautions that overpotting causes root rot.
Repot ahead of schedule if you observe either of these warning signs:
the soil remains heavy and waterlogged, showing the physical breakdown described by the society;
a crusty white residue forms around the pot rim or across the soil surface.
White crusting indicates accumulated fertilizer salts, according to the Connecticut Agricultural Experiment Station. To leach accumulated salts, run fresh water freely through the root zone for roughly 20 minutes. Use rainwater if your household tap water is hard. If mineral crusting reappears, repot the plant in fresh soil and wash the container.
Step-by-step: how to repot a camellia
Water the camellia the day before repotting so the root ball slides out in one solid piece.
Remove the plant from its container and gently loosen the outer layer of old soil from the root ball with your fingers.
If the camellia has reached your desired size, trim 1 to 2 inches (2.5 to 5 cm) from the outer root tips using a clean knife. This is the root-pruning technique from the American Camellia Society. Then return the shrub to its existing pot.
If the camellia is still growing, select a slightly larger pot with open drainage holes.
Add fresh potting mix to the bottom until the top of the root ball sits at the exact same depth as it did in the original container.
Fill the gaps around the edges with fresh potting mix, pressing down lightly with your fingers.
Never pile fresh soil over the top of the root ball. The International Camellia Society warns that burying roots too deeply suffocates them by cutting off oxygen.
Water thoroughly until liquid drains from the base, then empty any water collected in the saucer.
For planting in the garden, UF/IFAS chooses the cool season so the roots establish before the heat. In Florida, this is from November to February. In Brazil, the equivalent period runs from May to August. If the camellia has buds, wait until flowering finishes before planting.
If you are unsure whether your shrub is a Japanese camellia or a sasanqua, Bloom (available for iOS) identifies species from a quick photo.
Frequently asked questions
Can you use regular potting soil or topsoil for camellias?
Do not use regular garden topsoil in containers. The American Camellia Society advises against using garden soil in containers because it compacts quickly and depletes organic matter. None of the reference sources evaluated generic bagged topsoil. The safest choice is a potting soil formulated for acid-loving plants, listing a pH of 6.0 or lower on the label.
Can you grow camellias in orchid bark mix?
None of the sources in this guide recommend growing camellias in straight orchid bark, making the balanced recipe your safest approach. The American Camellia Society uses fine pine bark as one of four equal parts. The remaining three parts are washed coarse sand, leaf mold, and an ericaceous potting mix. Coarse bark pieces are reserved strictly for the base of the container.
Can I use azalea potting mix for camellias?
Yes. Azaleas and camellias share the exact same soil needs: an acidic, porous, and well-draining medium. The RHS notes that wherever rhododendrons (the plant group that includes azaleas) thrive, the soil is well suited for camellias. Check the bag to confirm a pH of 6.0 or lower.
What pot should I choose for a camellia?
Choose a pot with bottom drainage holes that is moderately larger than the current root ball. The American Camellia Society gives the benchmark of sizing up from a 1-gallon (4-liter) pot to a 3-gallon (11-liter) pot after 2 years. Pots that are far too large leave unrooted soil soaked for long stretches, which the RHS links directly to root rot.
Action checklist for today
Check the pH printed on your potting mix bag. For camellias, look for 6.0 or lower.
If your camellia grows in a garden bed, test a spoonful of soil with vinegar for fizzing.
If container soil is 3 or more years old, stays waterlogged, or shows a white crust, repot the plant.
Switch to collected rainwater if your household tap water leaves white mineral deposits on cookware.
Sources
UF/IFAS Extension, Camellias at a Glance (CIR461, 2024 revision)
International Camellia Society, How to Care For Camellias and Effects of liming on the growth of Camellia japonica cultivars in acid soils
RHS, How to grow camellias, Camellia problems, Acidifying soil and Chalky soils
Rowe A. (2025), Effect of drainage layers on water retention of potting media in containers, PLOS ONE 20(2)
Ministry of Agriculture, Normative Instruction No. 5, of March 10, 2016
Related articles
How to Care for Hibiscus: Sun, Watering, Fertilizer, and Pruning for Flowers
How to care for hibiscus: 6 hours of direct sun, evenly moist soil without waterlogging, half-strength fertilizer in spring and summer, and pruning in early spring. Find out why the flower lasts one day and why buds drop before opening.
Do Ferns Like Sun or Shade? It Depends on the Type
Ferns prefer bright shade: plenty of light, but no direct sun on their fronds. Tuberous sword fern is the exception that handles sun. Here is the ideal light for each type, where to place pots, and how fronds show too much or too little light.
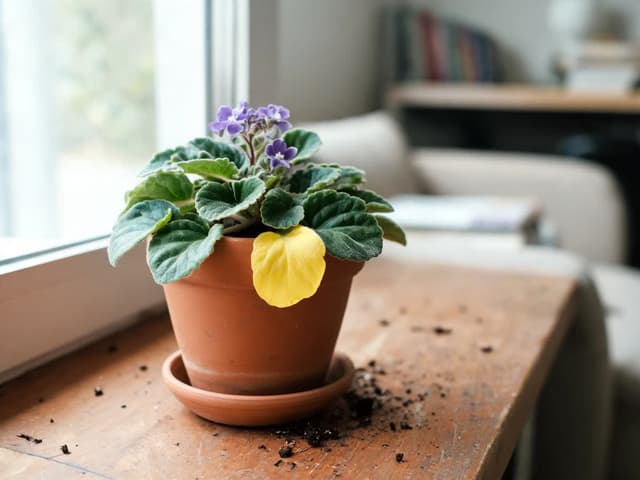
African Violet Yellow Leaves: Causes and What to Do
Yellow leaves on an African violet usually stem from overwatering, and the first place to check is the center of the plant. Losing one lower leaf at a time is normal. Identify whether age, watering, cold water, sunlight, cold drafts, or fertilizer is the culprit based on the yellowing pattern, and see what to do today.