How to Repot a Succulent: When to Change Pots and When to Water After
Repot your succulent in dry soil, using a pot with drainage that is only slightly larger than the roots, and time the watering correctly: the same day if no roots broke, or after 7 days if any were cut. In the southern hemisphere, spring is September to November.
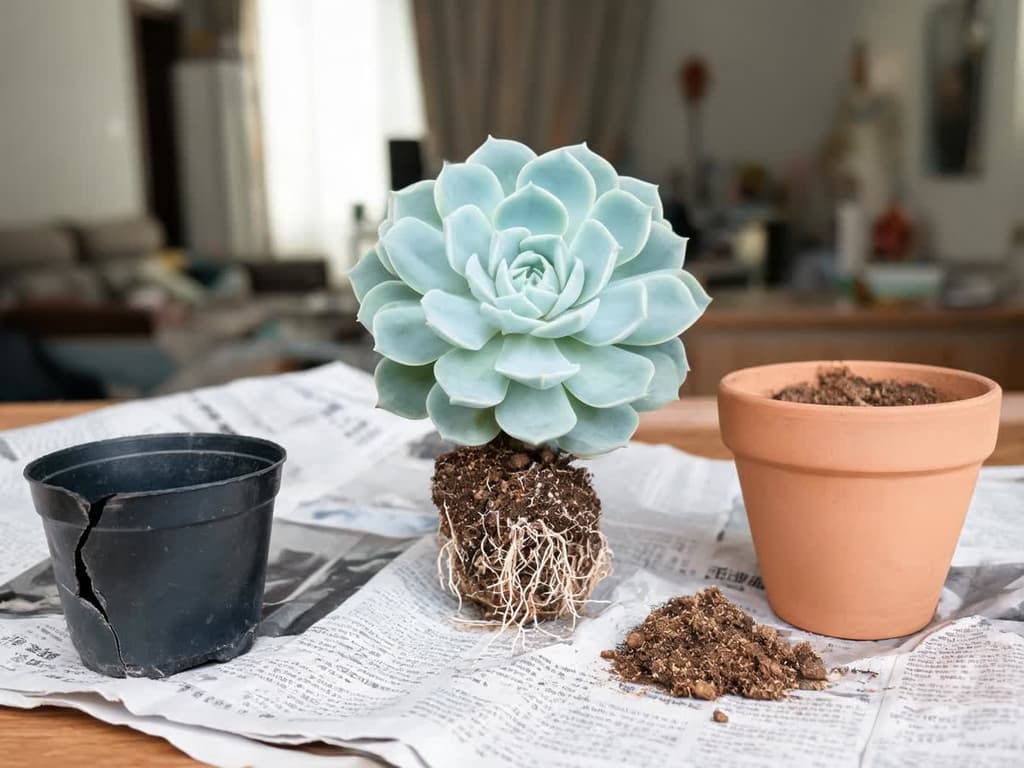
To repot a succulent, start with completely dry soil, holding off on watering for several days beforehand. Remove the plant from its pot by grasping the base, loosen the old soil, and trim off any dark, mushy roots. Plant it at the exact same depth it was growing before. Use a container with a drainage hole that is only slightly larger than the root system, filled with fast-draining potting mix. Post-repotting watering depends entirely on the roots. If no roots broke or were trimmed, a light watering on the same day is fine. If you cut or tore any roots, keep the soil completely dry for at least 7 days.
The best time is the beginning of the active growing season, which the Royal Horticultural Society (RHS) places in spring. In the southern hemisphere, this runs from September to November.
Quick summary:
When to repot: roots growing out through the drainage hole, a distorted or cracking pot, soil degraded into dust, or a top-heavy plant tipping over.
Pot: always use drainage holes, choosing a container only slightly larger than the root system, 2.5 to 5 cm (1 to 2 inches) wider than the previous pot.
Soil: dry at planting time and containing a mineral component (perlite, which consists of lightweight white grains of volcanic rock; fine gravel; or coarse sand).
Post-repotting watering: light watering on the same day if no roots broke or were cut; 7 days without water if any roots were cut or broken.
When to repot your succulent
Repot your succulent whenever any of these signs appear:
roots emerging through the bottom drainage hole or circling tightly around the root ball (the mass of soil and roots that comes out of the pot in one piece);
a plastic pot that is bulging, misshapen, or cracking;
soil that has turned to fine powder, settled deeply into the pot, or stays soggy for many days after watering;
a plant that has grown so large and top-heavy that it tips out of its container.
Iowa State University Extension provides horticultural guidance to the public. According to the university, potting mix breaks down over time and begins holding excess water. The same source notes that a large plant can become top-heavy and require a wider, heavier container to remain upright.
Outside of these situations, leave the plant in place. Iowa State points out that succulents do not need frequent repotting and generally thrive when slightly root-bound, since smaller volumes of soil dry out faster. The RHS shares the same criteria: repot only when roots have filled the pot or the plant has physically outgrown it.
The best time to repot succulents in Brazil
The RHS recommends spring, when the plant resumes growth. In the Southern Hemisphere, spring runs from September to November. The same source gives succulents a winter rest period, with little to no watering. In Brazil, winter runs from June to August. During this rest, the plant barely grows, and the RHS instructs to provide little to no water.
Cracked pots and rotting roots cannot wait until spring. In both scenarios, the danger of leaving the plant unattended far outweighs the stress of unseasonal repotting.
The pot: drainage holes, materials, and size
A bottom drainage hole is essential. According to Iowa State, succulents cannot tolerate standing water, and a layer of gravel or crushed stone at the bottom of the container is no substitute for a drainage hole. Even with this layer, a pot without drainage remains far too damp for the plant.
A gravel layer at the base also steals valuable space from the root system. Every inch of stone means an inch less of root-supporting soil, and proper drainage comes entirely from open drainage holes. Because of this, gravel layers are unnecessary: what the container actually needs is an unobstructed hole.
Want to use a decorative ceramic pot without a hole? Iowa State recommends double-potting. Grow the succulent in a slightly smaller nursery pot with drainage holes, then slip that container inside the decorative outer pot. After every watering session, dump out any standing water that pools at the bottom of the cachepot.
Potting materials directly influence how long the soil stays wet:
Pot | What happens to water | In practice |
|---|---|---|
Unglazed clay (terracotta) | Evaporates through the porous walls as well | Soil dries out much faster; Iowa State considers this ideal |
Plastic | Escapes only through the drainage hole and the surface | Works well, but requires longer dry intervals between waterings |
Glazed ceramic | Escapes only through the drainage hole and the surface | Behaves like plastic; requires a drainage hole or double-potting |
The University of Arizona Campus Arboretum states that both pot materials work, with watering frequency being the main variable you must adjust.
The ideal pot size is only slightly larger than the root system itself. Iowa State recommends a container sized to comfortably hold the root mass. The RHS warns that oversized pots hold moisture too long and promote root rot. For newly rooted cuttings, University of Illinois Extension recommends a container 2.5 to 5 cm (1 to 2 inches) wider. Use this same measurement as your starting guideline.
Soil mix for repotting
Choose a potting mix that drains rapidly. Iowa State recommends commercial cactus and succulent potting soil, or standard potting soil amended with extra perlite and coarse sand. You can find our balanced homemade soil recipe in our guide to succulent care.
Always add fresh potting mix to the container completely dry. The University of Arizona Arboretum specifically advises repotting into dry soil. Watering should occur only later, according to the schedule detailed in our watering section.
How to repot a succulent: step-by-step instructions
Gather your supplies first: the new pot, dry potting mix, clean pruning shears, newspaper to protect your workspace, and gloves if your succulent has spines.
Do not water in the days leading up to repotting, waiting until the soil is bone dry. Dry soil slides away from the pot and root mass with minimal friction. Wet soil turns into heavy mud that rips off delicate feeder roots.
Turn the pot onto its side. If working with a plastic pot, gently squeeze the sides until the root ball slides free. For clay pots, carefully slide a butter knife or dull blade along the inside perimeter to loosen the root ball.
Grasp the plant at the base of the main stem, right at the soil line. Pulling by the foliage snaps leaves off. If the plant has thorns or sharp spines, Iowa State suggests wrapping a folded strip of newspaper around the stem or wearing thick gardening gloves.
Tease away the old soil with your fingers. Clear away loose potting mix without rinsing or scrubbing the root system. Iowa State advises removing only the soil that falls away freely.
Inspect the root system carefully. Healthy succulent roots are firm and pale. Rotted roots look dark, feel mushy, and fall apart when touched. Use clean shears to trim away all rotted roots until you expose clean, healthy tissue.
Pour dry soil into the base of the new pot. Adjust the depth so the base of the plant's stem rests at the exact same soil level as it did in the original container.
Set the plant inside and double-check the planting depth. Keep the lowest leaves completely above the soil surface, letting them rest gently against the top of the mix at most.
Fill in around the root ball with dry soil. Gently tap the base of the pot on your work table to settle the mix, then press lightly around the container's perimeter with your fingers, avoiding direct pressure onto the roots.
Clean any debris out of the center rosette. A rosette is a circular, rose-like cluster of succulent foliage. Brush away any trapped soil particles from between the leaves. UF/IFAS Extension warns that water or debris trapped in an echeveria's center crown triggers fungal rot.
Top the soil with fine gravel if you prefer. The RHS frequently uses gravel top-dressings for potted succulents.
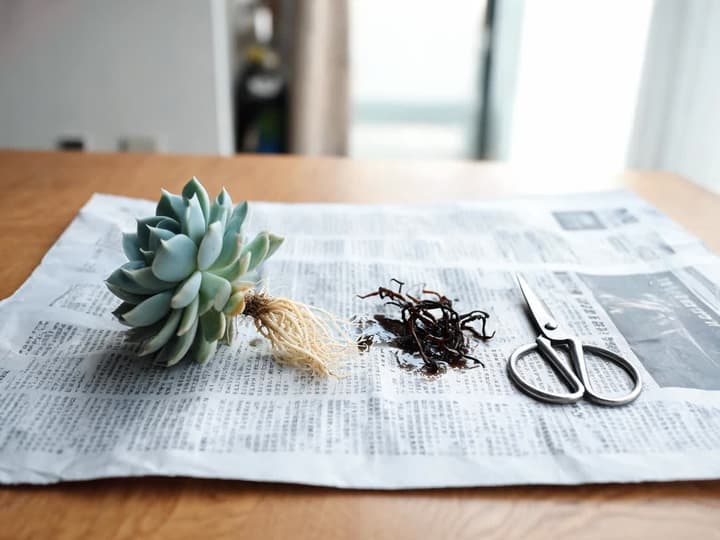
Handling large or heavy succulents
Succulents with large, fleshy rosettes like echeverias break their leaves easily during repotting. Lay the container on its side across sheets of newspaper and support the plant from underneath the foliage, right at the stem base. If the specimen is too large to manage solo, have a partner hold the container steady while you gently extract the plant.
If a broken leaf came off clean, retaining the small basal tissue that attached to the main stem, you can propagate it into a brand-new specimen; learn the full technique in our guide on how to propagate succulents.
Succulents with stretched, leggy stems and foliage concentrated only at the very top can also be corrected during repotting. Iowa State notes that repotting provides the perfect opportunity to prune elongated stems and divide crowded offsets for propagation.
When to water your succulent after repotting
Your initial watering depends entirely on root condition during repotting. If no roots snapped or were cut, give the plant a light drink on the same day: just a small splash of water to moisten the root zone. If you trimmed, snapped, or tore roots, keep the soil completely dry for at least 7 days.
Authoritative sources differ on this exact timeline. Iowa State concludes repotting in its succulent guide with "a light watering." The University of Arizona Campus Arboretum, in its cactus care literature, advises the exact opposite: dry soil and no water for at least 7 days. University of Arizona Extension, in its desert rose guide (a succulent with a swollen caudex), is the only source specifying the deciding condition. It explains that newly repotted plants can be watered immediately if the root system suffered minimal damage.
Root condition during repotting | Initial watering schedule | Reason |
|---|---|---|
No roots snapped or were pruned (you only loosened loose soil) | Light watering on the same day | Intact roots have no open wounds for fungal rot to exploit |
Roots tore or snapped while removing old soil | Wait 7 full days with completely dry soil | A torn root is an open wound, and wet wounds allow pathogens to enter |
You pruned away rotted roots | Wait 7 full days with completely dry soil | Same reasoning, with higher danger: fungal rot pathogens were already active |
This guide takes root condition as the deciding rule: only Arizona Extension clarifies under which specific condition immediate watering is safe, making a 7-day dry rest the safest option whenever cuts occurred. Light moisture on undamaged roots causes no harm. Water on fresh root wounds promotes rot.
Once that initial post-repotting watering is done, resume your normal plant care routine. Drench the pot until water drains freely from the bottom hole, and wait until the soil is completely dry before watering again. This soak-and-dry watering routine is what Iowa State recommends to prevent fungal root rot.
Post-repotting care: light exposure and fertilizer
Keep the succulent in its original light conditions for the first few days. Sunburn occurs when a succulent moves from lower light into intense direct sun too quickly, explains Iowa State. This leaves permanent bleached, straw-colored, or brown patches on the foliage. The Arizona Arboretum suggests marking the side of the pot facing the sun and positioning that exact side toward the light in its new location.
If your plant needs more sunlight, transition it into brighter light gradually once it settles into its new container. Find precise illumination guidelines for every setup in our guide on how much light succulents need.
Do not fertilize immediately after repotting. Hold off on feeding until you see fresh leaf growth emerging from the center of the rosette, confirming that roots have re-established. Check ideal timing and application rates in our guide on how to fertilize succulents.
Emergency repotting: saving a succulent with root rot
A soft, droopy succulent with mushy, translucent lower leaves sitting in damp soil is almost certainly suffering from root rot caused by overwatering. An emergency repot can sometimes rescue the plant, though success is not guaranteed. According to Iowa State, succulents occasionally recover once their soil dries out. Other times the rot has advanced too far, leaving stem and leaf cuttings from healthy tissue as the only survival option.
Follow these steps for an emergency rescue repot:
Remove the succulent from its container and strip away all waterlogged potting mix.
Prune away every dark, soft, or foul-smelling root with clean shears. Strip off any mushy, translucent leaves as well.
Let the bare-root plant rest on a dry surface in bright shade with good air circulation until all cut surfaces feel dry and callused to the touch. Sources specify no fixed timeline for this: inspect the wounds daily. Do not place the plant in direct sun to dry, as sudden direct exposure burns fragile foliage.
Pot the plant into fresh, bone-dry potting mix inside a sanitized container with drainage holes.
Wait at least 7 full days before giving it any water.
If the main stem is also soft and darkened at the soil line, the root system can no longer sustain the plant. When this happens, behead the plant by cutting the healthy upper stem above the rot and root the stem cutting using our step-by-step stem cutting guide.
Arranging multiple succulents in a single pot
You can easily plant multiple succulents together in a shared container. Iowa State explains that because most succulent species share identical cultural requirements, grouping several varieties into a single shallow dish works beautifully. The RHS recommends choosing a container sized to fit the plants snugly, rather than selecting an overly large bowl.
When creating a mixed arrangement, plant each specimen with its individual root ball intact, filling empty gaps between plants with fresh soil. Our initial watering rule applies to the whole arrangement: if even a single plant suffered root damage during assembly, keep the entire container dry for the full 7 days.
Did you receive a succulent dish and do not recognize the varieties? The Bloom app identifies plants instantly from a single photo (iOS).
Frequently asked questions
Can I repot succulents in the winter?
Yes, if an emergency requires it: such as a shattered container or active root rot. Routine repotting is best scheduled for spring, as recommended by the RHS, when plants resume active growth. In the southern hemisphere, spring runs from September to November. For seasonal care adjustments, check our guide on succulent care in winter.
How long should I wait to water my succulent after repotting?
It depends on the condition of the roots. If no roots snapped or were trimmed, give the plant a light watering the same day, following Iowa State guidelines. If any roots were cut or broken during the process, wait at least 7 full days with the soil completely dry, as directed by the University of Arizona Campus Arboretum. Water on fresh wounds encourages fungal rot.
Do succulents need pebbles or charcoal at the bottom of the pot?
No. What allows water to escape is a clear drainage hole at the base of the container. Iowa State warns that a drainage layer of gravel cannot replace an open drainage hole and leaves potting soil excessively wet. Bottom rock layers also take up space that belongs to potting mix and root systems.
Can I plant a succulent in a ceramic pot without drainage holes?
Only by using a double-pot system. Plant the succulent into a slightly smaller plastic pot with drainage holes, then place that container inside the decorative ceramic pot. Iowa State recommends this exact method. Empty pooled water from the decorative outer container after every watering session, as roots left sitting in water quickly rot.
Summary: how to repot succulents without losing your plant
Repot only when your plant shows clear signals: roots emerging from drainage holes, cracking plastic, soil that refuses to dry, or a top-heavy stem tipping the pot over. Choose a pot with drainage holes that is only slightly larger than the root ball, along with dry potting mix. Keep the plant at its original depth and let the condition of the roots guide your first watering session. For long-term care following repotting, explore our complete guide to succulent care.
Related articles
How to Care for a Maidenhair Fern: Light, Water, and Revival Tips
Learn how to care for a maidenhair fern indoors: bright indirect light, consistently moist soil, high humidity, and how to revive it if it dries out completely.
How to Propagate Spider Plants: Root the Pup Before Cutting
The safest spider plant cutting comes from a pup still attached to the mother plant: rest the plantlet on soil in a small pot, wait for roots to establish, and only then cut the stolon. Learn when the pup is ready, whether rooting in water is worth it, how to divide the clump, and why plants fail to produce babies.
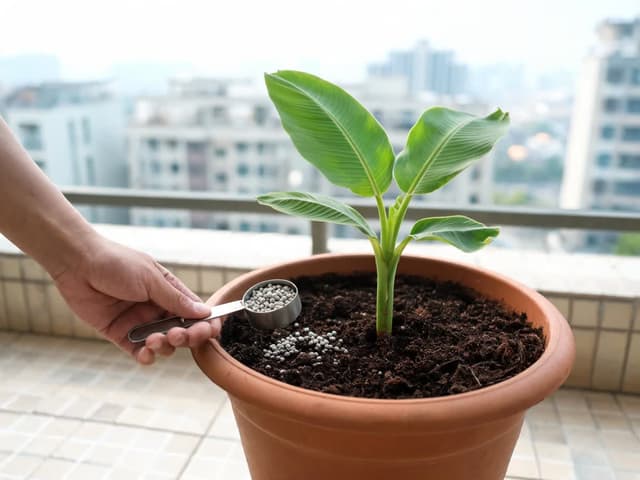
Banana plant fertilizer: fertilizing potted and backyard plants
Banana plant fertilizer needs more potassium than nitrogen, in a 3-1-6 ratio. For a potted plant on a balcony, use the label dose in spring and summer. In the backyard, fertilize every 2 months, adjusting the amount by mat age. Learn the formula, timing in Brazil, and signs of deficiency or excess.